Butter Cookies by Volume
A while ago I said I would try to convert the butter cookie recipe I used for the Squaresville Cookies into cups, and so here we go. Conversions for weight to volume are out there, they are just sometimes a bit of a pain to find. Joyofbaking.com has some of the more commonly used ingredients, and how much one cup of each weighs.
These are the sort of cookie I always thought were really boring - until I just kept making them, over and over, because they are good. I know that does not sound like wild enthusiasm, but this cookie is buttery, crunchy, and delicious. It is also versatile. The cookie itself is not incredibly sweet, so you can add wild frostings or sandwich it with sweet fillings, and it comes through with a buttery, almost toasted, crunch. This also makes it pretty ideal to nibble with a cup of tea, it is pleasant without sending you off the edge to loopy from sugar. It's just not a cookie you think of much, easily overpowered in attraction by chocolate chip or oatmeal cookies, drop cookies that seem less fussy to make and less requiring of a special occasion to make.
It is true: these will take some time, even if a lot of it is spent waiting for the dough to chill, the rolling and cutting can get tedious. Then again, good chocolate chip cookies are supposed to take 48 hours. (Though they still don't have to be rolled and cut out carefully. You can just chuck the bowl in the fridge and scoop lumps on a tray two days from now. Which I also enjoy doing. It's just different.).
If you plan ahead-ish, you can make the dough one day, roll out the next, freeze or refrigerate the unbaked cookies until you are ready to bake them (for a reasonable amount of time. A few days, certainly.) - at almost every step you can stop and decide you don't want to deal with them anymore, something I do pretty regularly. They also keep for a while in a cookie tin/airtight container when you are done.
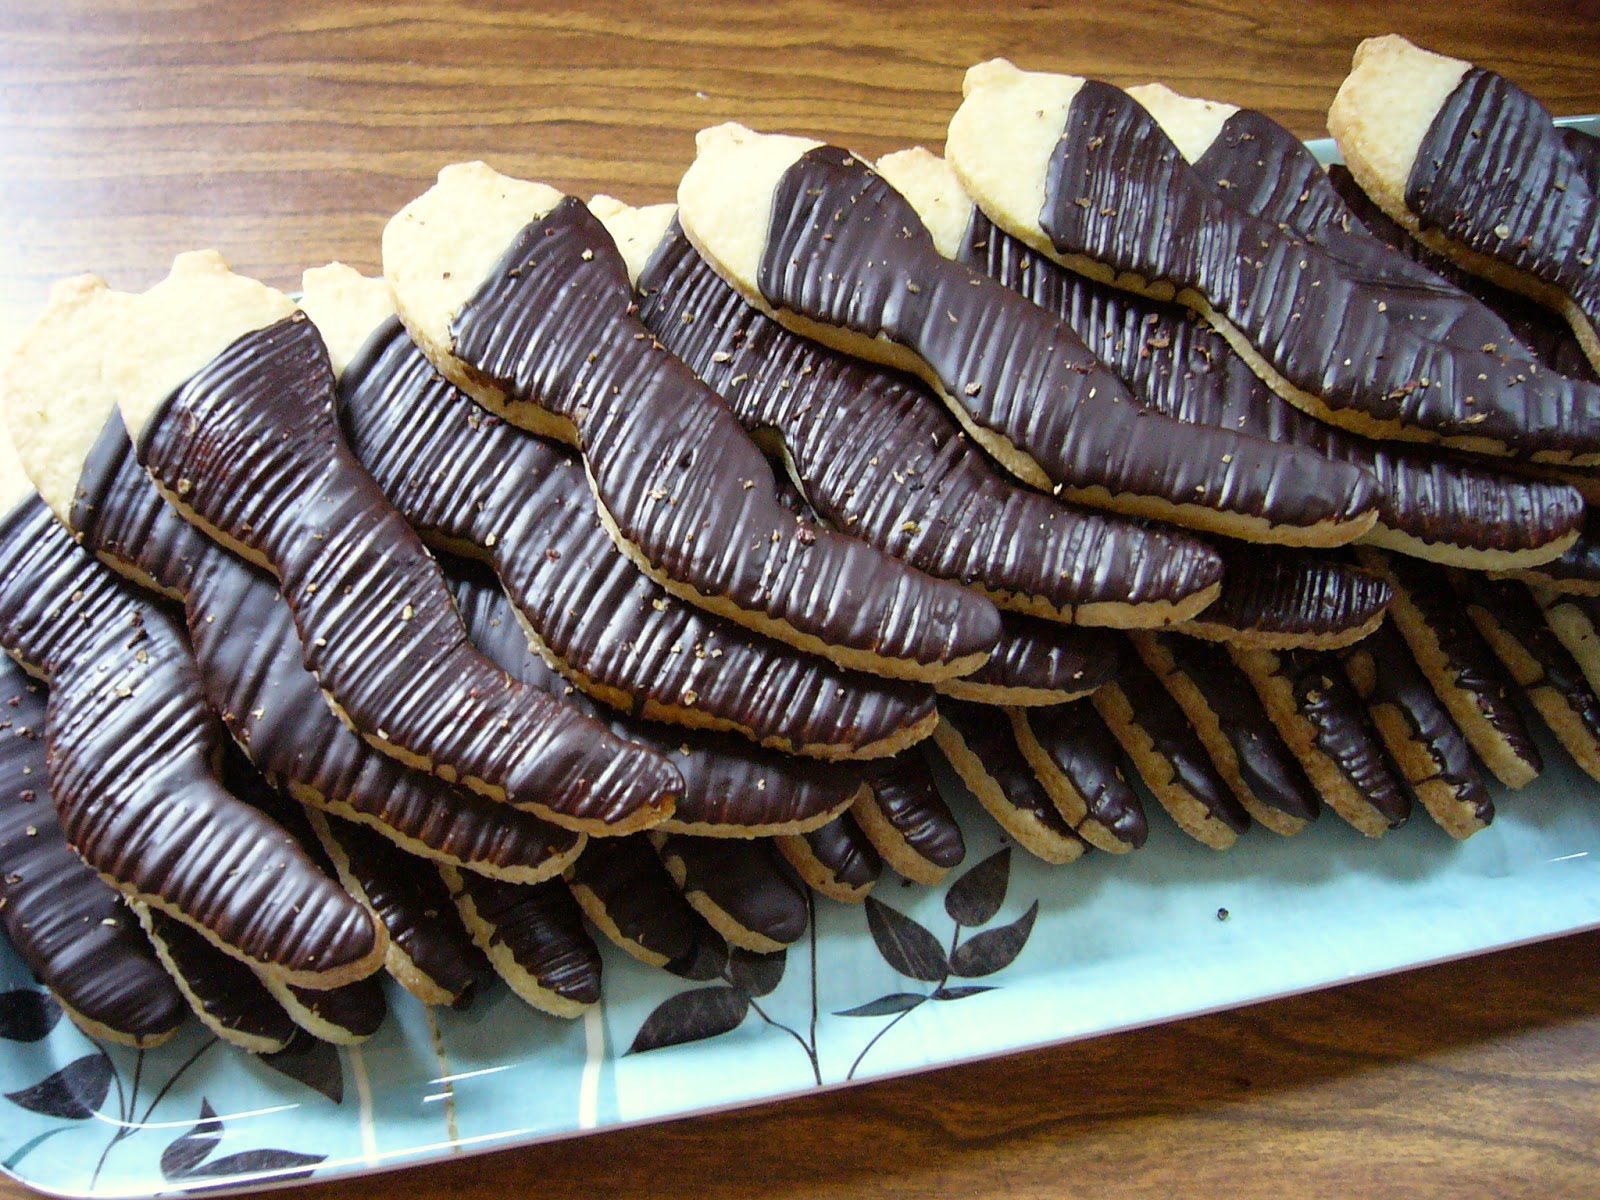
Today's version we will cover in chocolate and pepper, if you like. When I made these, I happened to have a grinder filled with Szechuan pepper, so I used that - it seemed like a good idea at the time (which may have been 4am. It's all a bit hazy). The result is not incredibly spicy, but subtle and interesting. (If you want something spicier, well. Add something spicier. A teaspoon of your favorite hot sauce is probably a good place to start, though I can't tell you what it will do to the chocolate, which does have a tendency to seize for any or no reason. Chili oil is a classic addition, you'll even find bars of it in most stores, so if you want that, you could just chop up and melt one of those to brush over your cookies.)
So, once you have your cookies, chop up about 200g of chocolate (what type is up to you) and melt it in a heatproof bowl over a pot of simmering water. Once the chocolate is melted, dip your cookies in the chocolate, let any excess drip off, and let the cookies cool and dry on a sheet of wax or parchment paper. Before the chocolate has completely cooled, grind the pepper over them, however much you like.
I got the textured effect from the bristles of my pastry brush, it kept leaving a less-than-smooth surface behind, so I decided to just use that and have fun with it.
The original recipe suggests adding a teaspoon of coconut oil to the melted chocolate, but in my case, that meant the chocolate never quite hardened, so after a few attempts with cookies, I used the rest to cover leftover pretzels, after the event was over. The chocolate on those never hardened either, but I can't say I really minded. Give it a try if you like, I probably will again at some point, it is entirely possible I just did something idiotically simple wrong.

Butter cookies! (From Chocolade by Johann Lafer)
1 cup plus 2 tbsp (2 sticks plus 2 tbsp) (250g) Butter
4 cup (150g) sugar
3 cups plus 1 tbsp (400g) flour
1 medium egg
a pinch of salt
Cube the butter (straight from the fridge is fine) and knead it with the sugar, flour, egg and salt until it forms a smooth dough. Wrap the dough in foil or plastic wrap and refrigerate for an hour. (You can refrigerate longer if you want to make the dough ahead of time, but I end up playing the too cold/too warm game a lot when I do that...which is fine if you have the time to do so. If you want to refrigerate the dough overnight, that works, just take it out of the fridge maybe an hour before you plan to roll it out.
Once chilled, roll out the dough on a floured surface and cut whatever shapes you like. If necessary, use a flat spatula to remove the dough shapes from your surface, the dough gets sticky again fairly quickly as it warms up. Gather up any scraps, roll them up together, chill if needed, and re-roll until you are out of dough.
Bake the cookies at 350°F, on a parchment-lined cookie sheet - how long depends on your cookie size. If they are smaller, start checking after 5 minutes, larger ones probably won't burn before the 8-minute mark, so you have a little more time to roll out the next batch or have a nice cup of tea. The cookies are done when they are set and no longer raw-looking in the middle, though I prefer to leave them in til the edges start to brown a bit- those caramelised parts add a lot of flavour.
Let the cookies cool on the sheet for 5-10 minutes, then transfer them to a wire rack to finish cooling.
Frost, cover in chocolate, sandwich with your flavour of choice, or nibble for breakfast, plain.
These are the sort of cookie I always thought were really boring - until I just kept making them, over and over, because they are good. I know that does not sound like wild enthusiasm, but this cookie is buttery, crunchy, and delicious. It is also versatile. The cookie itself is not incredibly sweet, so you can add wild frostings or sandwich it with sweet fillings, and it comes through with a buttery, almost toasted, crunch. This also makes it pretty ideal to nibble with a cup of tea, it is pleasant without sending you off the edge to loopy from sugar. It's just not a cookie you think of much, easily overpowered in attraction by chocolate chip or oatmeal cookies, drop cookies that seem less fussy to make and less requiring of a special occasion to make.
It is true: these will take some time, even if a lot of it is spent waiting for the dough to chill, the rolling and cutting can get tedious. Then again, good chocolate chip cookies are supposed to take 48 hours. (Though they still don't have to be rolled and cut out carefully. You can just chuck the bowl in the fridge and scoop lumps on a tray two days from now. Which I also enjoy doing. It's just different.).
If you plan ahead-ish, you can make the dough one day, roll out the next, freeze or refrigerate the unbaked cookies until you are ready to bake them (for a reasonable amount of time. A few days, certainly.) - at almost every step you can stop and decide you don't want to deal with them anymore, something I do pretty regularly. They also keep for a while in a cookie tin/airtight container when you are done.
Today's version we will cover in chocolate and pepper, if you like. When I made these, I happened to have a grinder filled with Szechuan pepper, so I used that - it seemed like a good idea at the time (which may have been 4am. It's all a bit hazy). The result is not incredibly spicy, but subtle and interesting. (If you want something spicier, well. Add something spicier. A teaspoon of your favorite hot sauce is probably a good place to start, though I can't tell you what it will do to the chocolate, which does have a tendency to seize for any or no reason. Chili oil is a classic addition, you'll even find bars of it in most stores, so if you want that, you could just chop up and melt one of those to brush over your cookies.)
So, once you have your cookies, chop up about 200g of chocolate (what type is up to you) and melt it in a heatproof bowl over a pot of simmering water. Once the chocolate is melted, dip your cookies in the chocolate, let any excess drip off, and let the cookies cool and dry on a sheet of wax or parchment paper. Before the chocolate has completely cooled, grind the pepper over them, however much you like.
I got the textured effect from the bristles of my pastry brush, it kept leaving a less-than-smooth surface behind, so I decided to just use that and have fun with it.
The original recipe suggests adding a teaspoon of coconut oil to the melted chocolate, but in my case, that meant the chocolate never quite hardened, so after a few attempts with cookies, I used the rest to cover leftover pretzels, after the event was over. The chocolate on those never hardened either, but I can't say I really minded. Give it a try if you like, I probably will again at some point, it is entirely possible I just did something idiotically simple wrong.
Butter cookies! (From Chocolade by Johann Lafer)
1 cup plus 2 tbsp (2 sticks plus 2 tbsp) (250g) Butter
4 cup (150g) sugar
3 cups plus 1 tbsp (400g) flour
1 medium egg
a pinch of salt
Cube the butter (straight from the fridge is fine) and knead it with the sugar, flour, egg and salt until it forms a smooth dough. Wrap the dough in foil or plastic wrap and refrigerate for an hour. (You can refrigerate longer if you want to make the dough ahead of time, but I end up playing the too cold/too warm game a lot when I do that...which is fine if you have the time to do so. If you want to refrigerate the dough overnight, that works, just take it out of the fridge maybe an hour before you plan to roll it out.
Once chilled, roll out the dough on a floured surface and cut whatever shapes you like. If necessary, use a flat spatula to remove the dough shapes from your surface, the dough gets sticky again fairly quickly as it warms up. Gather up any scraps, roll them up together, chill if needed, and re-roll until you are out of dough.
Bake the cookies at 350°F, on a parchment-lined cookie sheet - how long depends on your cookie size. If they are smaller, start checking after 5 minutes, larger ones probably won't burn before the 8-minute mark, so you have a little more time to roll out the next batch or have a nice cup of tea. The cookies are done when they are set and no longer raw-looking in the middle, though I prefer to leave them in til the edges start to brown a bit- those caramelised parts add a lot of flavour.
Let the cookies cool on the sheet for 5-10 minutes, then transfer them to a wire rack to finish cooling.
Frost, cover in chocolate, sandwich with your flavour of choice, or nibble for breakfast, plain.

Comments
Post a Comment